• Home
  • /
  • Tag Archives:  pavers
Kitchen Wall Tile

Kitchen Wall Tile

Kitchen Wall Tile

Install a kitchen wall Backsplash Home Depot

Kitchen Wall Tile

Proper planning makes for smooth process to install Kitchen Wall Tile.

Make a list, have everything assembled before getting started.

Always to get at least 10% to 20% extra for breakage and trim.

BASIC Back Splash Tile Materials:

Tape Measure

Chalk (for lines)

Thinset or tile adhesive

(Buy the correct amount of thinset/adhesive as it is to hold the tile on the wall)

Notched trowel

Use two thirds of the thickness of the tile being set.

(The trowel is for spreading the adhesive “combs” it onto the surface)

Level

Level is used to insure that installation is done on an even surface, if the floor is not even sand or remove excess material.

Tile Spacers

(Are to insure the lines between the tiles are properly spaced, usually 1/16 inch to 1/2 inch for kitchen walls.

The average being 1/8 inch grout line which is pleasing to the eye.)

The wet tile saw is circular and cuts with water lubrication.

You can make straight cut with the tile saw only, not nippers.

It is suggested to rent a wet saw, if you don’t know someone that will share theirs with you.

Especially if this is a onetime project.  If you plan on doing more projects buy good wet saw.

(Wet Saw has a range of prices but will be a couple hundred dollars).

One hundred and fifty dollars is the average cost.

Nippers

(For wall tile installation these maybe all you need, however you should always have additional cutters)

Practice cut on cheap tiles first with nippers and/or tile saw

(Snap/Rail cutter is usually about $20)

Grout Float

You’ll need a rubber grout float to apply the grout after the tile is set and a grout is dry.

Non-sanded grouts are used for narrow areas

There will be many colors to choose from. Stores will have a sample palate that can be matched against the tiles to ensure correct color.  Choice of: Non-sanded grouts are used for narrow areas up to 1/8″, Sanded grouts are used for areas from 1/8″ to 3/4″ and more.

Sponge will wipe off the excess grout from the tile.

Remember to get Cleaning Cloths.

Add Goggles to your list.

You should be using a Pencil to writ everything down and you will need it again.

Include a Hammer on your list you will need it

Rubber Gloves are very important to protect your hands

Knee Pads help you keep your knees from bruising.

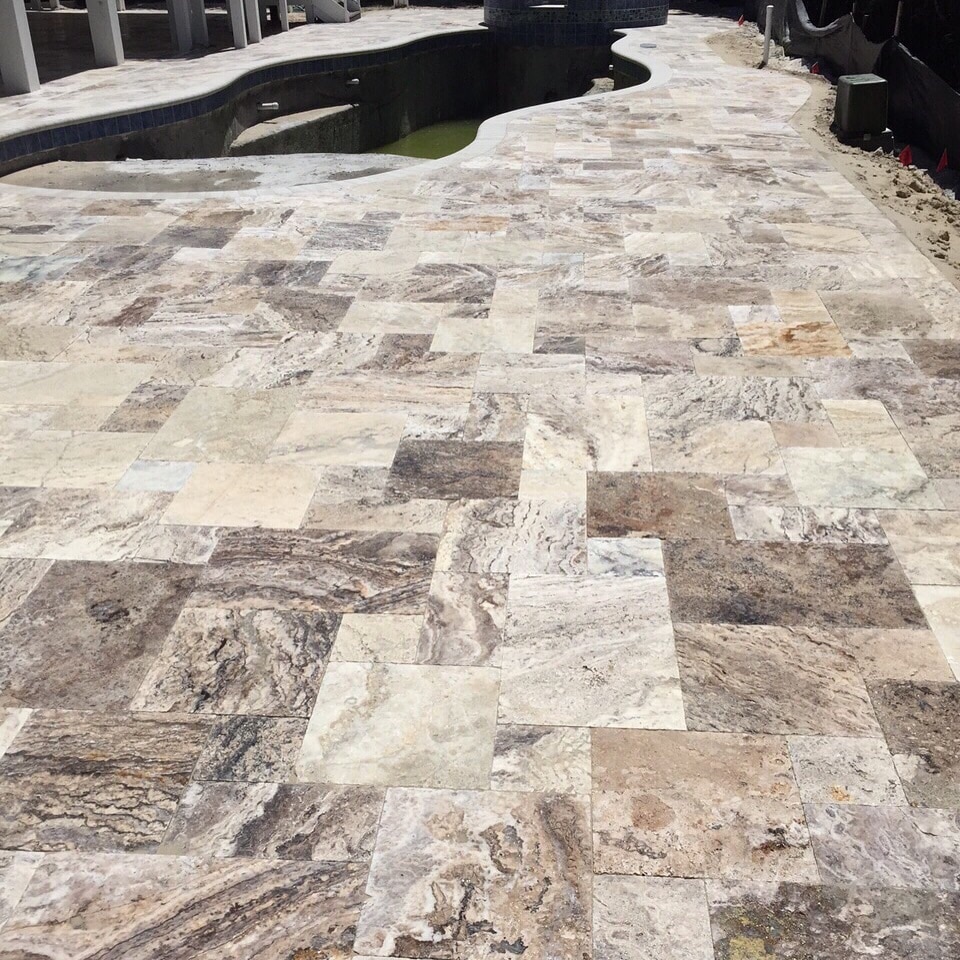
Mosaics Tile sheets are curved on all sides, giving them the ability to fit together with a seamless finish.
It is the art of creating an assemblage of small pieces of natural stone creating a complete pattern for use on floor,
walls, back splashes, kitchen, and bathroom. It is a technique used to create interior or artistic design.

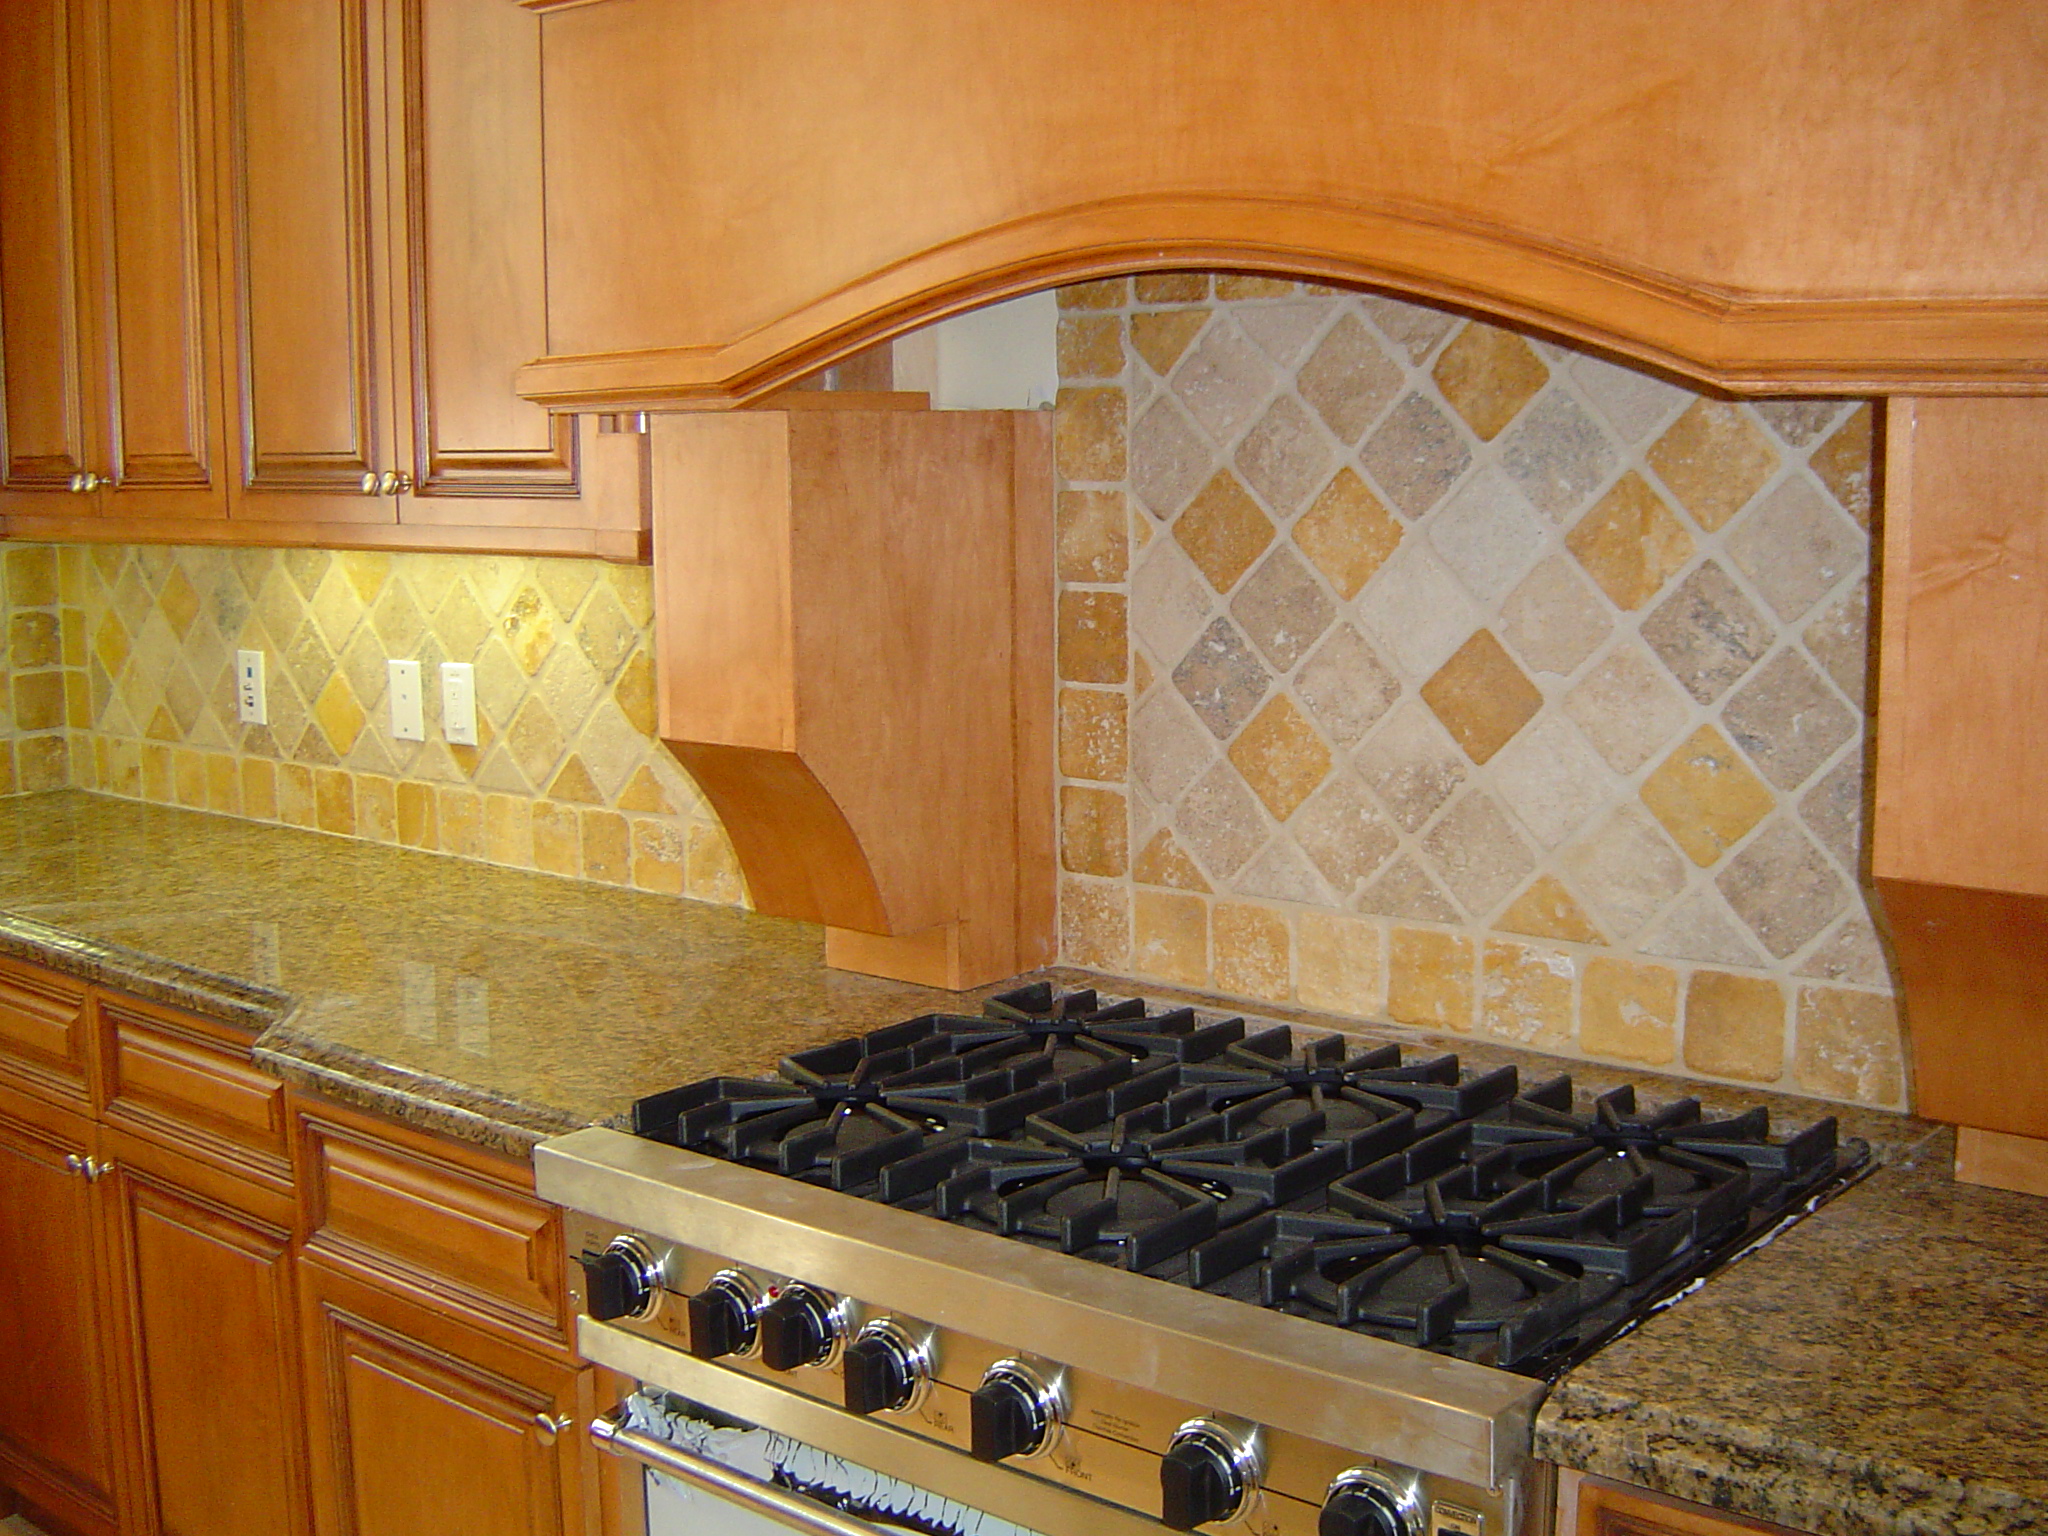
Kitchen Tile Back Splash

Lay tiles before using adhesive and then tiles can be cut with a knife on grout lines.

You should take measurements measure to center of the room.
Use a pencil to mark the corners then pick tiles up. Start at each corner and mark chalk lines to make a box for the field tile.
Next mix thinset to a thick creamy consistency, allow it sit for 10 minutes. Then use a notch towel 1/4 x 1/4  and then set tiles.
Inlay tiles with a margin trowel and lay them in place.
To get wall tiles to size cut with a wet saw,you can use a tile nipper for small tight areas.

Stone Tile Us ships everywhere and fast, check our flooring tile shipping policy. 

Check our latest natural stone blogs to help you visualize yours.

If you need more information about our natural stone selection, give us a call today 855-344-8716.

Find more information and the materials needed for this project here: http://thd.co/XXl0uG Find backsplash options from The Home Depot here: …

source

Pool Coping Installation

Pool Coping Installation

Pool Coping Installation

Pool Coping Installation


We have everything you need to accomplish a successful Pool Coping Installation project.

In stock is the natural stone coping with the pavers to match for a professional finish.

Stone Tile Us ships everywhere and fast, check or flooring tile shipping policy. 

Check our latest natural stone blogs to help you visualize yours.

If you need more information about our natural stone selection, give us a call today 855-344-8716.

TRAVERTINE PAVERS INSTALLATION

TRAVERTINE PAVERS INSTALLATION

TRAVERTINE PAVERS INSTALLATION

TRAVERTINE PAVERS INSTALLATION

Stone Tile Us pavers are available in Marble and Travertine with finishes: tumbled, honed and filled. The finish on these stones are good for traction of vehicles and walking. The dense, hard material of travertine pavers makes them good for driveways, patios, pool and decks. They are resistant to moisture, cold, heat and erosion.  There is no heat retention and its surface remains cool to the touch. We offer a good variety of colors and sizes to blend with your outdoor design.

Surface Preparation (Important)

Travertine pavers are durable, however, they are breakable so it’s important to properly prepare the surface. Pavers sized 6×12 are best for driveway to prevent cracking from the pressure of vehicles. Larger sizes, and French Pattern, are good for outdoor, deck and pool areas but not recommended for driveway use.

TRAVERTINE PAVERS INSTALLATION STEPS:

Dry-Set

Is highly recommended it is easy to lay and replace if needed and is the best option for cold weather.

Steps:

Excavate if needed

Compact (Soil has to have the correct moisture level)

Level, compact and repeat

Add 6” to 8” crushed limestone (sharp edges assist a snug fit) allows for good drainage.

Compact layers

Add the limestone in 2 -3 layers

Level compact and repeat

Top with ½” sand

Then lay pavers

Clearly define borders 6×12 Travertine Pavers

After pavers are in place Polymeric sand can be swept between cracks, grout, or they can be left alone

TRAVERTINE PAVERS INSTALLATION Mud-set

Uniform ground, surface/platform.

Excavate 6″ to 8″ of soil

Clear the area and create a level platform

Use a plate compactor to compact the soil

Fill area with crushed gravel (limestone base 3” to 4”)

Pour 4” concrete slab

Add mortar and lay the travertine pavers

Start from the edge of the driveway and work your way inwards.

Flexbond is recommended for cold weather mud set travertine paver installation that will be mud-set on top of a concrete surface.

It allows contraction and expansion during the extreme cold weather cycle as  will as prevent cracking.

TRAVERTINE PAVERS INSTALLATION Sand set

Excavate the area and compact the soil.

Add a crushed limestone base 4” to 5”

Crushed limestone is a sure foundation, and will help the pavers stay in proper position while allowing proper drainage.

Add 1” to 2” of concrete sand over crushed limestone.

Lay pavers starting from the edge of the driveway and work your way in (use something like a concrete slab, to hold pavers in position during installation).

Pavers should be placed in a fitted pattern for good snug fit.

Fill the joints in with polymeric sand (usually a mix of sand & special additives that are used for filling paving stone joints).

Edging

It’s recommended to install landscape edging on the outside edge of the pavers this will keep them from shifting out of position (top of the edging must be level with the travertine paver edge)

An alternative is pouring concrete along the outside edge after tiles are set (top of the edging must be level with the travertine paver edge)

Finishes

Your outdoor travertine paver finish options are:

Tumbled finish, has textured, porous finish that is skid-resistant.

Honed is a smoother finish than tumbled  but still has needed traction when wet.

Polished finish is smooth and should only be installed in covered outside areas porch patio etc…

TRAVERTINE PAVERS INSTALLATION Patterns

The pattern is up to you as there are several pattern/size options:

6×12, 8×8, 8×16, 12×12, 12×24, 16×16, 16×24, & 24×24

French pattern/mini-French pattern

Pattern repeats after the first square ends (tiles are 16″ by 24″, 16″ by 16″, 16″ by 8″ & 8″by 8″ pavers and is set to cover 16 sq. ft. area. You should place tiles close together and you should fill the joints with sand).

When pavers are set, check for level, go over the area with a plate compactor again.

Stone Tile Us ships everywhere and fast, check or flooring tile shipping policy. 

Check our latest natural stone projects to help you visualize yours.

If you need more information about our natural stone selection, give us a call today 855-344-8716.

CLEANING TILE

CLEANING TILE

CLEANING TILE

CLEANING TILE

It is never advisable to use any harsh cleaning chemicals on natural stones as the stain can become worse or set on the tile.

Keep the natural stone tiles clean, by using a dry, clean dust mop-for your CLEANING TILE.

Do not use any abrasive chemicals or a vacuum cleaner as those may stain and/or scratch the surface of the tile.

StoneTech Professional Revitalizer Cleaner and Protector by DuPont is one of the suggested cleaners for your natural stone.

Pressure washing is sometimes needed for deep cleaning from tree and plant debris or in areas that collect a lot of water and get stained.

If you have a salt water pool, your pavers will need to be sealed with a water-repellent salt water sealer, and it’s better if applied before installing, to ensure that the entire paver is protected and not just the surface.

Here are a few products that can be used for Natural Stone cleaning:
KlenzAll heavy duty alkaline cleaner and degreaser
Oil and Stain Remover
Revitalizer cleaner & protector
BulletProof – sealer
Impregnator pro – sealer

TILE CLEANING 

STAINS

Natural stones such as travertine, marble, granite, etc. are porous materials which means they are absorbent making them prone to stains.  At the same time, that characteristic also means that stains can be easily removed.  When you notice a stain, clean it as soon as possible for better results.

All you need to do is to “lift” the stain by using a product called Stone Pro Deep Clean Gel which is sold at retail stores.

If that fails, it means that the stain is embedded in your tile.  In that case, you can use Stone Pro Wet Poultice Stain Remover that is a ready-to-use paste which does not requires mixing or measuring.

You can purchase both items at this store:  http://www.mystonecare.com/Stone-Problem-Solvers-Tile-Problem-Solvers-s/19.htm

TILE CLEANING 

SEALING YOUR STONE

This is a personal choice.  However, by using a sealer, your natural stone products are better protected against stains and dirt.

There are several kinds of sealers in the market.  When selecting one, make sure it is the correct one for the kind of tile you purchased.  We recommend the following brand:  http://miraclesealants.com/

The best person to help you make that decision is your installer.  Make sure to ask him for recommendations.

Advantage of paver sealant:

Protect outdoor stone against stains from tree and plant debris or in areas that collect a lot of water and get stained and mildew.

The sealer is deep penetrating and preserving of the stone’s natural surface texture while keeping stains and mildew out.

Sealer will also reduce damage that can be caused by spills from things that can stain like wine.

Disadvantages of sealing pavers:

Recommended 5 year re application of a professional sealer. It may even be yearly according to the brands manufacture instructions that you choose.

If you’re a DYI person you can actually get it done for a fraction of the cost.

Seal Pavers-needed are:

White clean cloth-absorbent suggested

Clean your Pavers

Apply the Sealer

Apply Finishing

Remove Excess and re apply

Back Splash Tile Installation

Back Splash Tile Installation

Back Splash Tile Installation

Back Splash Tile Installation

See our previous blog for a list of materials and tips

1. Make sure the wall surface has a sound structure (Good dry wall etc..)

2.The wall should be clean and flat (It’s been suggested to sandpaper or paint over the walls primer or sealer)

3.Measure to see how much tile you’ll need and get some extra from the same lot number.

4. Tiles purchased on sheets will allow for faster installation as you’ll be laying several at a time.

5. Cut tiles with a wet saw according to your needed measurements.

6. Lay tiles on the counter to get an idea of the layout pattern you want. (Cut tiles to size if needed).

7. Turn off power and remove wall face plates.

8. Apply Mastic (adhesive) with a notched trowel. Add to the walls with the flat side of the trowel.

9. Start at the center and work your way up horizontally. (Only apply to a 3×3 foot area at a time to prevent drying).

10. Double back over the application of adhesive with the notched side of the trowel to remove excess.  (Use a small trowel for small areas and tight corners).

Back Splash Tile Installation

11. Apply adhesive to the back of the tiles then lay them on the wall, starting at the base of the counter tops and working your way up.

This method will give you a straight edge guide and allows needed cuts/angles to be made under cabinets and exhaust fans.

12.Gently tap tiles into place with a mallet. Continue to lay tiles in a row and remove any surface excess (Every few minutes check for proper alignment).

13.Remove spacers, wipe surface clean, and let the tiles set over night before grouting.

14.Mix grout according to manufactures instructions.

15.Apply grout in a diagonal pattern using a rubber float holding it at a 45-degree angle.

16.Fill the seams with grout and wipe off excess with a damp sponge once grout is firm.

17.After grout dries a haze will form which must be removed with a clean sponge.

18.Apply cork (not grout) at the boarder of the counter tops and wall edges to seal and prevent cracking.

19.Replace switches and wall plates you may need longer screws.

20. Back Splash Tile Installation is now complete as always get professional advice before starting your installation project