Floor Tile Installation Project
Floor Tile Installation Project
Your 1st step in natural stone Installation should be to seek the advice from licensed, insured professional.
The company you choose should have natural stone installation expertise
Always remember don’t to check their customer ratings it will guide you.
If possible a reference/referral from a friend or neighbor with a good experience can be so priceless.
Regardless of how you approach the project do your research.
The same applies if you want to do your own installation, below are general steps further research should be done before beginning the project and more detailed information needs be obtained before laying natural stone tiles.
Floor Tile Installation Project
1. Protect your lungs, hands and eyes as you install your marble tiles.
2. Use gloves, face mask and protective goggles.
3. Remove all tiles that are already installed.
4. Clean and dry floor before you start installation.
5. Use the longest level you can find and level the floor.
6. Sand bumps and fill holes with thin-set cement make sure it dries.
7. Lay plywood if the floor is still not even.
8. Check for change in height, no more than ¼ inch or 6 mm with distance of 10 feet or 3 mm.
9. Use your finger nails to check for cracks or irregularities on the surface of the tile,
Note: If there is a crack don’t use it will break during the installation.
Floor Tile Installation Project
10. Measure your layout on paper, decide on the pattern of layout and draw the pattern to scale.
11. Try not to cut tiles if possible leave full-sized, keep strips 2 inches (5 cm) wide and long.
12. Measure the center of the room and light mark with a pencil.
13. Do a dry-run by placing your tiles within the grid before actually laying them.
14. Add a layer of thin-set adhesive on the floor with a notched trowel.
15. Lay stone tile us marble tiles firmly in the thin-set adhesive.
16. Use spacers to position the marble tiles.
17. Use level to check the tiles.
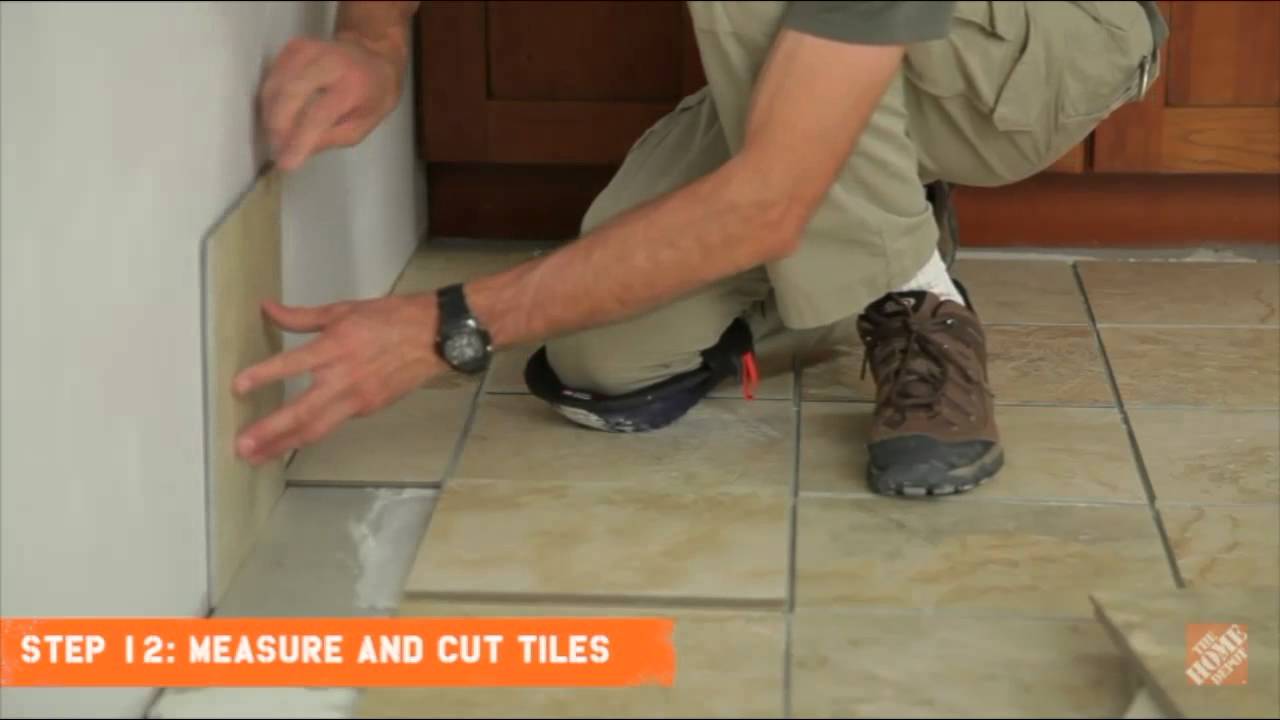
18. Take measurements of any partial tiles needed
19. To fit in the edges along the walls or odd spaces, use a wet saw to cut the tiles and prevent cracking.
20. Leave tiles 24-48 hours to allow for complete drying completely.
Floor Tile Installation Project
21. Seal Stone.
22. Use grout, or mortar, to fill in spaces between the tiles.
23. Use a moist sponge to dampen the spaces between the tiles.
24. Then fill spaces with cement.
25. Push it into the spaces to create a tight fight.
26. Clean any grout on top of the tiles as you go while still damp.
27. Squeegee is use to spread out the grout.
28. Wipe down the tile surface with a clean sponge
29. Let the grout to dry.
30. Then Seal the grout.
Stone Tile Us ships everywhere and fast, check or flooring tile shipping policy.
Check our latest natural stone blogs to help you visualize yours.
If you need more information about our natural stone selection, give us a call today 855-344-8716.
See more: http://thd.co/1usoQ9y Watch our How to Install Ceramic and Porcelain Floor Tile videos and learn the steps needed for a successful installation. You’ll …