• Home
  • /
  • Tag Archives:  tile
Wayfair Area Rugs Home Decor

Wayfair Area Rugs Home Decor

Wayfair Area Rugs Home Decor

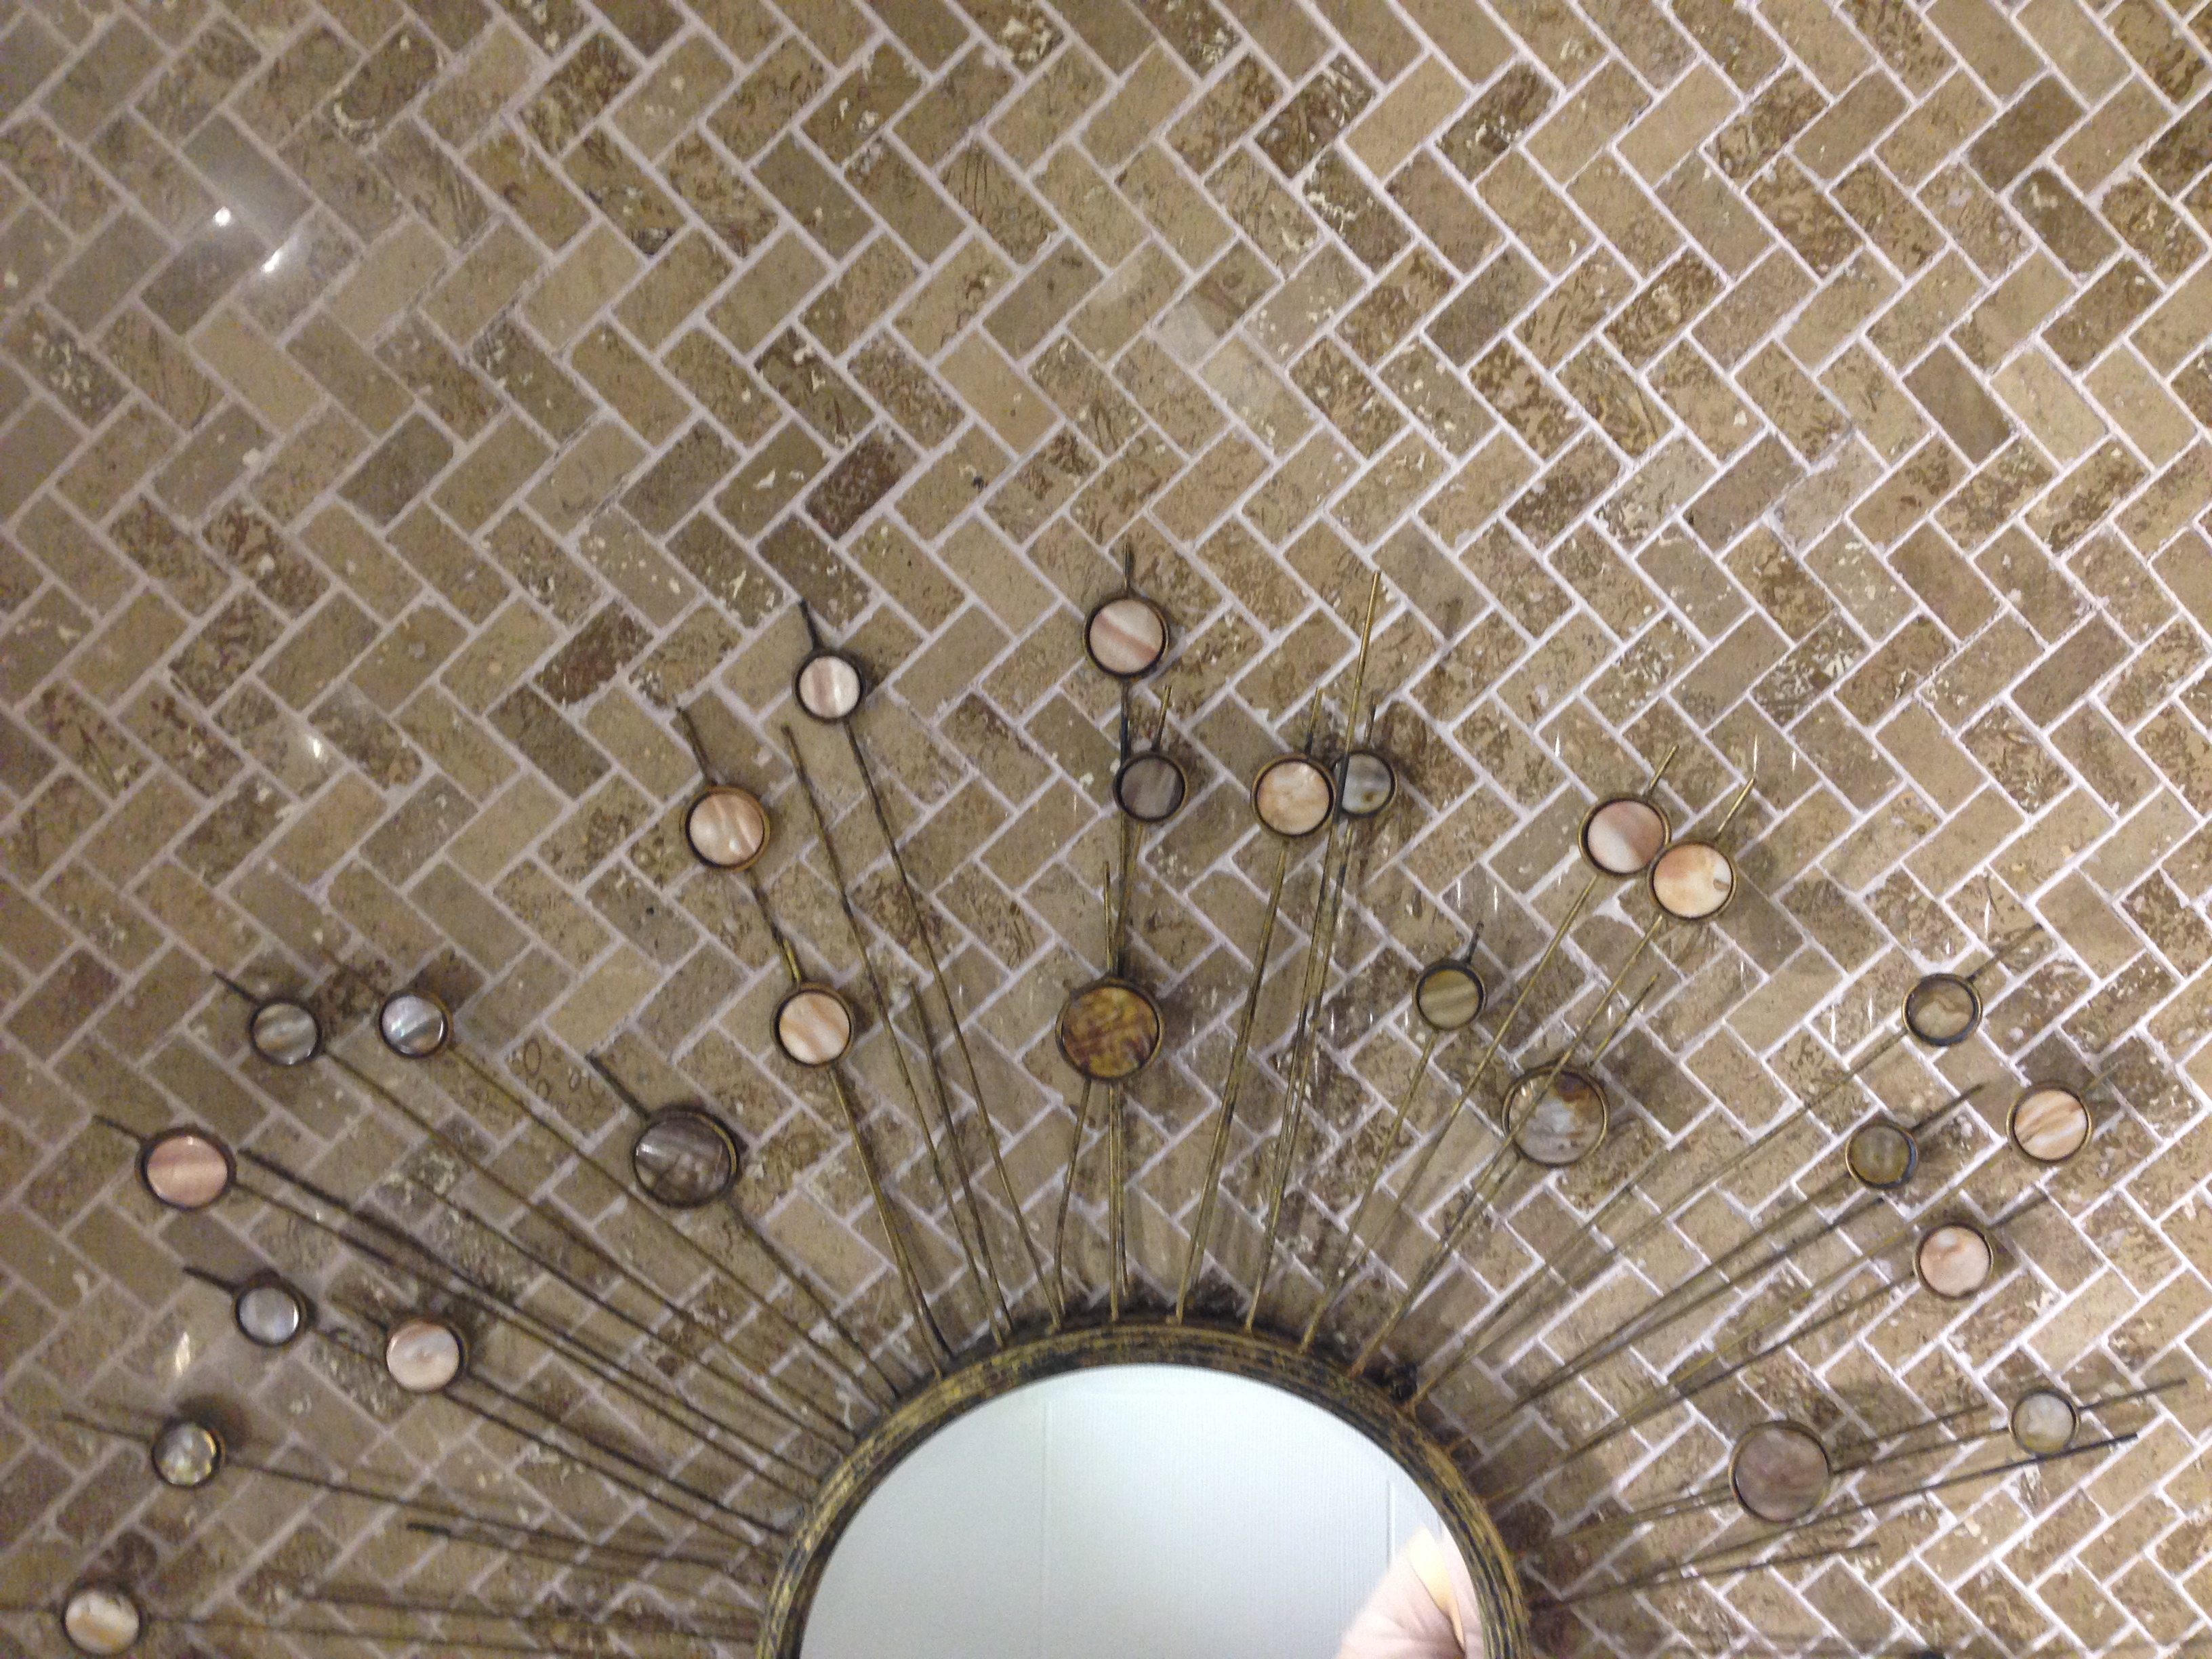
Wayfair has a beautiful selection of area rugs that will personalize and accent your natural stone floor adding a layer of warmth and uniqueness to your space.  Choosing a neutral color cream or taupe allows you the flexibility to use an accent rug with any floor pattern and incorporate it with most designs. Patterns on the rug can add a sense of style and movement without interfering with your color palette.

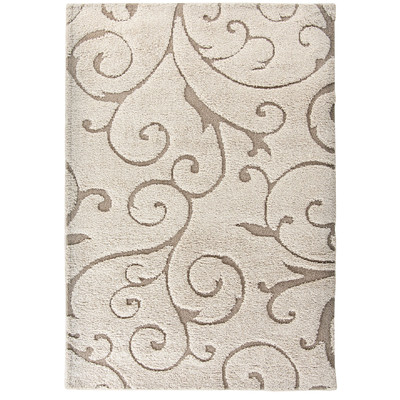
The Henderson Beige Area Rug by Alcott Hill gets great reviews from their customers:

“A great purchase and a great price”

“This rug is so comfortable and soft and just plain gorgeous”

“The main reason I love this rug is that it does not show dog hair”

Wayfair Area Rugs Home Decor

Wayfair Area Rugs Home Decor

The suggestion is to purchase a rug based on the shape of your room and make sure your rug is not hidden by furniture.

Wayfair Area Rugs Home Decor

Wayfair Area Rugs Home Decor

Wayfair has lots of rug options and wool or cotton is suggested for high traffic areas based on the durability of these materials. If you need help choosing an area rug take a look at Wayfair’s guide.

Stone Tile Us ships everywhere and fast, check or flooring tile shipping policy. 

Check our latest natural stone projects to help you visualize yours.

If you need more information about our natural stone selection, give us a call today 855-344-8716.

The Materials Tools Natural Stone Installation

Materials Tools Natural Stone Installation

Materials Tools Natural Stone Installation

Materials Tools Natural Stone Installation

Shopping List

MATERIALS & TOOLS

Materials Tools Natural Stone Installation- Cleaning Cloths, Tile, Tile Adhesive, Grout, Silicone Caulk and Silicone Grout Sealer.

Your Tools will be: Goggles, Rubber Gloves, Knee Pads, Level, Tile Cutter, Tile Saw, Carpenter’s Square, Sponge, and Rubber Grout.

Also needed are Float, Pencil, Tape Measure, Hammer, Notched Trowel or Spreader and Bucket.

Materials Tools – Natural Stone Installation, Your 1st step in marble travertine Installation should be to seek the advice from licensed, insured professional.

Another option is a company with  marble and travertine (natural stone) installation.

Remember to check their customer ratings.

Whenever possible a reference/referral from a friend or neighbor with a good experience can be so priceless.

Regardless of how you approach the project do your research. 

The same applies if you want to do your own installation.

The information given in this article are general steps further research should be done.

Always do planning before you begin any project.

Get as much detailed information as possible on the project before you start.

Materials Tools – Natural Stone Installation

Stone Tile Us ships everywhere and fast, check or flooring tile shipping policy. 

Check our latest natural stone projects to help you visualize yours.

If you need more information about our natural stone selection, give us a call today 855-344-8716.

You may install Stone Tile Us travertine marble on: patios, pools, decks, bathroom, kitchen and pools.
In modern times, travertine is still favored for construction.

It can also be used for many applications such as floors, walls, kitchen backslash and counters, and decorative accents.
We offer free travertine samples. Save money buying premium stone from our factory.

Travertine Tiles come in: 12″X24″, 18″X18″, 24″X24″, Honed and Filled, French Pattern Polished, French Pattern Tumbled, & Brushed and Chiseled.
Honed finish has a smooth and dull appearance.

It is less than polished and has different degrees of dullness.
Polished is when the stone buffed to the most refined and highest level with a natural high shine.

Back Splash Tile Installation

Back Splash Tile Installation

Back Splash Tile Installation

Back Splash Tile Installation

See our previous blog for a list of materials and tips

1. Make sure the wall surface has a sound structure (Good dry wall etc..)

2.The wall should be clean and flat (It’s been suggested to sandpaper or paint over the walls primer or sealer)

3.Measure to see how much tile you’ll need and get some extra from the same lot number.

4. Tiles purchased on sheets will allow for faster installation as you’ll be laying several at a time.

5. Cut tiles with a wet saw according to your needed measurements.

6. Lay tiles on the counter to get an idea of the layout pattern you want. (Cut tiles to size if needed).

7. Turn off power and remove wall face plates.

8. Apply Mastic (adhesive) with a notched trowel. Add to the walls with the flat side of the trowel.

9. Start at the center and work your way up horizontally. (Only apply to a 3×3 foot area at a time to prevent drying).

10. Double back over the application of adhesive with the notched side of the trowel to remove excess.  (Use a small trowel for small areas and tight corners).

Back Splash Tile Installation

11. Apply adhesive to the back of the tiles then lay them on the wall, starting at the base of the counter tops and working your way up.

This method will give you a straight edge guide and allows needed cuts/angles to be made under cabinets and exhaust fans.

12.Gently tap tiles into place with a mallet. Continue to lay tiles in a row and remove any surface excess (Every few minutes check for proper alignment).

13.Remove spacers, wipe surface clean, and let the tiles set over night before grouting.

14.Mix grout according to manufactures instructions.

15.Apply grout in a diagonal pattern using a rubber float holding it at a 45-degree angle.

16.Fill the seams with grout and wipe off excess with a damp sponge once grout is firm.

17.After grout dries a haze will form which must be removed with a clean sponge.

18.Apply cork (not grout) at the boarder of the counter tops and wall edges to seal and prevent cracking.

19.Replace switches and wall plates you may need longer screws.

20. Back Splash Tile Installation is now complete as always get professional advice before starting your installation project